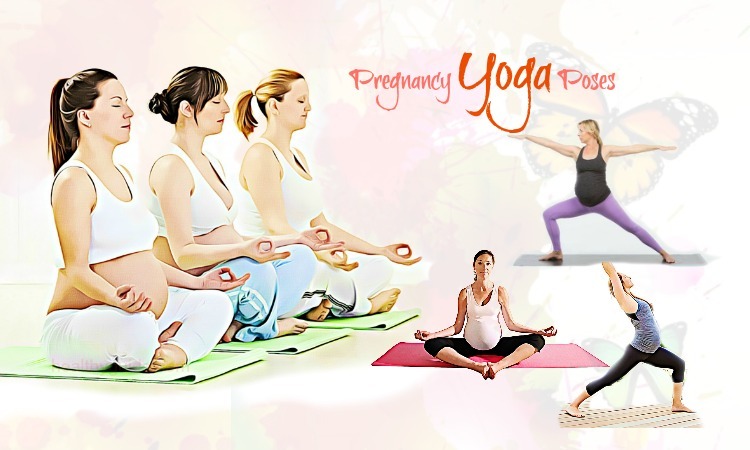
List Of Pregnancy Yoga Poses For Pregnant Women
In this article, I will show you some of the simple pregnancy yoga poses that women who are pregnant or trying to get pregnant should practice regularly. All of these yoga poses can help them know how to reduce pains caused by pregnancy and overcome this experience more easily through yoga. So, if you are concerned about this problem, keep both of your eyes on this interesting article right now.
CONTENTS
I. Safety Instructions For Pregnant Women
To ensure that you and your growing baby are safe, you need to take some of the following precautions:
- Avoid inversions, backbends, headstands and shoulder stands.
- Avoid asanas and deep twists that put pressure on your belly.
- Keep in mind that comfort comes first, so you do not push yourself.
- Focus on breathing.
- Use props if required
- Keep in mind that you are taking care of both yourself and your baby.
- Consult your doctor when you have anything uncomfortable.
Read on How to Tighten Belly Skin with Foods and Exercises – 28 Tips to discover some of the best ways that can help you tighten your belly skin through diet and exercises/
II. Some Easy Pregnancy Yoga Poses For You
1. Bound Angle Pose

This is the first one of the easy pregnancy yoga poses that I want to mention in this article and want all of my readers who are pregnant or trying to get pregnant should know. This yoga pose offers many benefits for health:
- Stimulate ovaries, abdominal organs, and prostate gland, kidneys and bladder
- Stretch the inner thighs, knees and groins
- Stimulate the heart and increase blood circulation
- Relieve menstrual discomfort and sciatica
- Reduce mild depression, fatigue and anxiety
- Reduce the symptoms of menopause
- Destroy diseases
- Ease childbirth if you practice this pose until late period of pregnancy
List of Top 48 Best Home Remedies for Stress Relief and Removal will show you some of the best ways that can help relieve stress effectively and naturally at home, so check it out!
Instructions:
Step 1:
- Sit with both of your legs straight out.
- Raise your pelvis if your groins or hips are tight.
- Then, exhale out while bending your knees and pulling the heels toward your pelvis.
- After that, drop the knees out to the sides. And, press your feet’s soles together.
Step 2:
- Keep your heels as close to the pelvis as you can.
- With the thumb and the first and second finger, you grasp your big toes.
- Always keep the edges of your feet firm on the ground. If you cannot hold the toes, clasp each hand around the ankle or shin.
Step 3:
- Sit so that your tailbone in back and your pubis in front are equidistant from the ground.
- Then, the perineum will be nearly parallel to the ground while your pelvis is in a neutral position.
- After that, firm the shoulder blades and sacrum against the back. Try to lengthen your front torso through the top of your sternum.
Step 4:
- Do not force your knees down; instead, release the top of your thigh bones toward the ground.
- When you achieve this action, your knees will follow.
Step 5:
- Keep this yoga pose for 1- 5 minutes.
- Then inhale in while lifting your knees away from the ground
- Finally, get your legs back to the original position.
Tips for the beginners: You can find difficult to lower your knees toward the ground. In case, your back is rounded and knees are very high, make sure to sit on a high support.
To know some of the natural ways that can help reduce leg pain and swelling, read on Top 26 Best Home Remedies For Leg Pain And Swelling Relief
2. Easy Pose
This is another one among best pregnancy yoga poses for pregnant women at all ages that I want to mention in this article today and want my female readers to consider applying for good. This yoga pose offers many benefits for health:
- Calm the brain
- Stretch the knees and ankles
- Strengthen the back, reduce back pain
Instructions:
Step 1:
- Fold 1-2 thick blankets into a firm support. Sit close to an edge of this blanket support and then stretch out your legs in front of your torso that is on the ground.
Step 2:
- Cross the shins while widening the knees.
- Then, slip each of your feet beneath the opposite knee like the way you bend the knees and fold in your legs toward the torso.
Step 3:
- Relax your feet so that their outer edges relax on the floor while the inner arches set below the opposite shin.
- You should see a triangle with three sides created by the crossed shins and the two thighs. Also, there is a comfortable gap between the pelvis and the feet.
Step 4:
- Sit comfortably so that your pelvis in a neutral position. Press the hands against the ground and raise your sitting bones off the support.
- Hang there for several breaths. Meanwhile, make the thigh bones heavy.
- After that, lower your sit bones slowly back to the support. Balance the tail bone and pubic bone so they can be equidistant from the ground.
Step 5:
- Either lay the hands on your knees, keeping palms down or stack the hands in your lap, keeping palms up.
- Try to draw your tailbone toward the ground. Keep your shoulder blades against your upper torso. But, you do not over arch the lower back and push the lower front ribs forward.
Step 6:
- You can keep this position as long as possible. But, in case, you practice it regularly, rememberto alternate the cross of your legs.
- Alternately, divide the time for practicing in half: the first half with the left leg forward while the second half with your right leg forward.
If you want to know some of the best ways that can help you deal with sagging skin on facial skin and leg skin, read on 19 Home Remedies For Sagging Skin On Face And Legs
3. Extended Triangle Pose
When it comes to simple pregnancy yoga poses to practice at home for pregnant women, you should try out extended triangle pose. Actually, this yoga pose offers some health benefits, they include:
- Strengthen your thighs, knees and ankles
- Boost the abdominal organs
- Stretchyour groins, hamstrings, chest, hips, shoulders, and spine
- Improve digestion
- Relieve stress and menopause symptoms
- Relieve backache, especially in the second period of pregnancy
Read More: Top 15 Foods To Reduce Bloating And Gas On Stomach
Instructions:
Step 1:
- Stand in Tadasana [1]. Either step or lightly jump your feet apart.
- Lift the arms parallel to the ground and reach them out to the sides, palms down and shoulder blades wide.
Step 2:
- Turn the left foot in to the right while the right foot out to the right about 90o.
- Line your right heel with your left heel.
- Then, keep your thighs firm, turning theright thigh outward. The center of your right knee cap and the center of your right ankle should be in line.
Step 3:
- Exhale and lengthen your torso over your right leg. Bend from your hip joint, not your waist.
- Strengthen your left leg and then firmly press your outer heel to the ground.
- Next, rotate your torso to the left. Allow your left hip to come forward and then lengthen your tailbone toward your back heel.
Step 4:
- Get your right hand relaxed on your shin without distorting the sides of your torso.
- Stretch the left arm toward the top. Keep the left arm and the tops of the shoulders in line.
- After that, keep the head in a neutral position with your eyes gazing at the left thumb.
Step 5:
- Keep this yoga pose for about 30- 60 seconds.
- Inhale and then strongly press your back heel into the ground while reaching your top arm toward the ceiling.
- After that, reverse your feet and repeat this process to the left.
See More: 14 Ways On How To Treat Stiff Neck Pain Fast And Naturally
4. Warrior Pose I

According to a study about yoga poses to strengthen the shoulders [2], this yoga pose helps you explore the upper body. Your legs will be strengthened while your chest will open up. It also keeps the spine healthy and prepares it to bear the weight of your growing uterus. Moreover, it helps you balance and focus as well.
Instructions:
- At first, place both of your feet width apart. When your pregnancy progresses, reduce the widening of the feet in order to reduce the strain on the pelvic floor.
- Then, pivot on the left foot, and allow the right foot to face forward. The arch of your left foot and your right foot should be in line.
- Then, lower your pelvis and raise your arms above your head while looking forward.
- Keep this yoga pose for as long as possible.
- Relax and then repeat this process with your left foot forward.
- Tip: You have to be next to a wall for instant support.
Actually, this is known as one of the best pregnancy yoga poses for pregnant women at all ages that you should consider practicing regularly, especially if you are pregnant and want to reduce pains caused by pregnancy.
5. Head-to-Knee Forward Bend
When you are looking for simple pregnancy yoga poses for pregnant women, you should not look down head-to-knee forward bend, yet consider practicing it for good. This yoga pose offers you some health benefits:
- Calm the brain and reduce mild depression
- Stimulate the kidneys and liver
- Improve digestion
- Stretch the spine, shoulders and groins
- Reduce the symptoms of menopause
- Reduce fatigue, headache, and menstrual discomfort
- Strengthen your back muscles during pregnancy
Directions:
Step 1:
- Sit on the ground with the legs straight in front of you. If required, place a blanket under the buttocks.
- Inhale, bend the right knee while drawing the heel back toward the perineum.
- Keep the right foot sole relaxed against the inner left thigh, and placethe outer right leg on the ground.
- Keep your shin at a right angle to your left leg.
Step 2:
- Press the right hand against your inner right groin and the left hand on the ground
- Exhale and then turn your torso to the left.
- Raise your torso when pushing down on your inner right thigh. Your navel and the middle of your left thigh should be in line.
- Use a strap to lengthen your spine evenly.
Step 3:
- When you are ready, reduce the strap and use your right hand to reach out the inner left foot.
- Inhale and raise the front torso. Press the top of your left thigh into the ground and lengthen the left heel.
- Press your left hand on the ground in order to increase the twist.
- After that, use the left hand to reach out the outside of the foot.
- With your arms extended, extend your front torso from your pubis to the top of your sternum.
Step 4:
- Exhale and then extend forward from your groins, not your hips.
- Do not pull yourself into your forward bend, shortening your front torso.
- After that, bend the elbows out to the sides before raising them away from the ground.
Step 5:
- Lengthen forward until you get a comfortable stretch. Your lower belly should reach your thighs first and your head last.
- Hold this yoga pose in 1- 3 minutes.
- Inhale and repeat this process with the legs.
6. Lotus Pose
This is actually one of the simple pregnancy yoga poses that pregnant women in the world love and have been practicing with not too many efforts at their own home. According to a research about lotus pose [3], this yoga pose offers you a few benefits for health, such as:
- Calm the brain
- Stretch the knees and ankles
- Stimulate the pelvis, abdomen, spineand bladder
- Reduce menstrual discomfort and sciatica
- Help ease childbirth.
Instructions:
Step 1:
- Sit on the ground with the legs straight in front.
- Bend the right knee and turn your lower leg into a cradle
- Raise the front torso toward your inner right leg so that your spine can lengthen.
- Then, rock the leg back and forth several times in order to explore the full range of hip joint’s movement.
Step 2:
- Bend your left knee and then turn the leg out.
- Rock the right leg farfrom the right, and then press the back of your thigh to lock the knee tight.
- Next, swing your leg across in front of the torso. Swivel from your hip and nestle the outside of the foot into your inner left groin.
- Try to bring your right knee close to your left.
- Then, press your right heel into your left lower belly.
Step 3:
- Slightly raise your right leg up off the ground, and raise your left leg in front of your right while holding the underside of your left shin in the hands.
- Then, slide your left leg over the right. Snug the edge of your left foot into your right groin.
- Swivel into position from your hip joint. Press the heel against your lower belly, and then keep the sole perpendicular to the ground.
- Keep the knees close together. Press the groins toward the ground by using the edges of your feet.
- If desired, place your palms in jnana mudra, with your first fingers and thumbs touching.
Step 4:
- Only hold this yoga pose for several seconds and then quickly release.
- Gradually, add several seconds to your pose each week.
There are other simple pregnancy yoga poses in this article. So, keep reading this article to discover them and then consider practicing one or more of them for good.
7. Warrior Pose II

Other best pregnancy yoga poses that pregnant women should know must include warrior pose II. This yoga pose offers you a few health benefits:
- Strengthen the legs and ankles
- Stretch the groins, lungs and chest, shoulders
- Stimulate abdominal organs
- Relieve backaches
- Increase stamina
Instructions:
Step 1:
- Stand in Tadasana. Exhale and step your feet apart.
- Lift your arms so that they are parallel to the ground and reach them out to the sides, with palms down and shoulder blades wide.
Step 2:
- Turn the right foot to the right and the left foot out to the left about 90o.
- Then, align the left heel along with the right heel.
- Firm the thighs and turn the left thigh outward. The center of your left knee cap and the center of your left ankle should be in line.
Step 3:
- Exhale and bend the left knee over your left ankle. Your shin should be perpendicular to the ground.
- Try to bring yourleft thigh parallel to the ground.
- Strengthen your right leg and then firmly press the outer right heel to the ground.
Step 4:
- Stretch your arms away from the distance between your shoulder blades, parallel to the ground.
- Keep both sides of your torso long and your shoulders over your pelvis.
- Then, press your tailbone toward the pubis.
- After that, turn your head to the left while looking out over your fingers.
Step 5:
- Hold this yoga pose for 30- 60 seconds.
- Inhale, reverse the feet and repeat this process with the left.
8. Ankle-to-Knee Pose
Apart from making space for the belly and opening your back, according to a study [4], this yoga pose will be helpful in reducing tension in your muscles under your glutes.
Directions:
- Start with a seated position.
- Then, slide right foot under your left knee, so your right knee can rest on the floor.
- Next, stack left shin on the top of right, so your left foot can rest on right knee while your left knee can rest on right foot.
- Gently rest palms on foot and knee.
- To get a deeper stretch, you can hinge forward.
- Alternate leg placement and repeat this process on the other side.
In fact, this pose is well-known for its ability to reduce tension in the muscles. So, if you are looking for pregnancy yoga poses, you should not look down this pose.
9. Wide-Knee Child’s Pose
If you have done yoga poses previously, you may know the effect of this yoga pose. This is because the belly become heavier when you get bigger, anything that reduces the pressure on belly is so amazing.
Directions:
- Place your knees on the ground, top of feet against the ground, bottoms on heels, big toes touching, and knees wider than the width between your hips [5].
- Slowly bring your chest to the ground. Let your body come between your legs.
- Then, lengthen your arms overhead and try to touch your forehead to the ground.
Actually, this pose is helpful for pregnant women, making it one of the best pregnancy yoga poses that you should try out!
10. Low Lunge Twist Pose
This is the last but very important one on the list of simple pregnancy yoga poses that I want to mention in this article and want all of my female readers should know and then make use for good.
Directions:
- Place your left foot on the floor, so your knee can be directly over the ankle and your leg bent to about 90o.
- When your palms are firm on the floor and then extend your right foot back.
- Shift the weight to your right hand, and then lengthen your left hand up to the ceiling while your eyes following your hand.
- Repeat this yoga pose on the other side.
In this article, I revealed some of the easiest pregnancy yoga poses that you should practice to ease pregnancy pains. We hope that you can practice one or more of them and then benefit from these yoga poses. Always consult your doctor when you start or continue your yoga practice and feel something uncomfortable. And, if at any stage of your pregnancy, you have a sensation of discomfort, discontinue immediately.
If you think that this article is helpful for pregnant women and you know other pregnant women who are suffering from pregnancy pains and want to deal with them by practicing yoga, feel free to share this list with them right now. Also, if you know other pregnancy yoga poses apart from those as I mentioned above, visit our Healthy Guide page and then leave your comments in the comment box.


Leave a Reply